Choosing the right tile installer matters most inside a shower, where the tile you see is only part of the job. Behind every shower that stays clean and watertight for years is a sequence of steps most homeowners never think about: demolition, plumbing preparation, substrate preparation, waterproofing, drainage, tile layout, grout, and finishing. Rush or skip any one of them and a shower can look perfect on install day yet fail quietly behind the wall within a few seasons.
As a Tile Installer Tampa homeowners call for custom showers and bathroom remodeling, Dream Tiles, Inc. treats every shower as a system — not just a surface. This walkthrough follows a real custom shower remodel from demolition through a finished frameless glass enclosure, showing the work that decides whether a shower performs for years or leaks behind the tile.
Complete Shower Remodel: Starting With Demolition
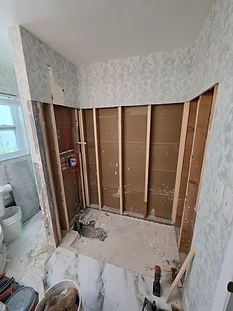
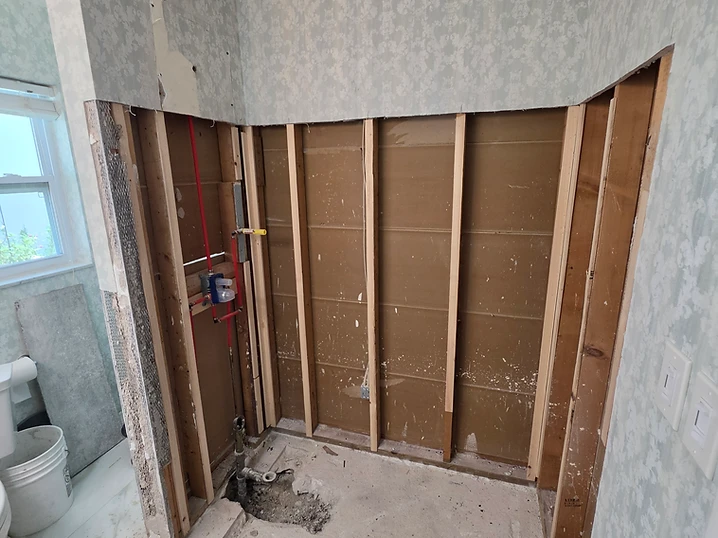
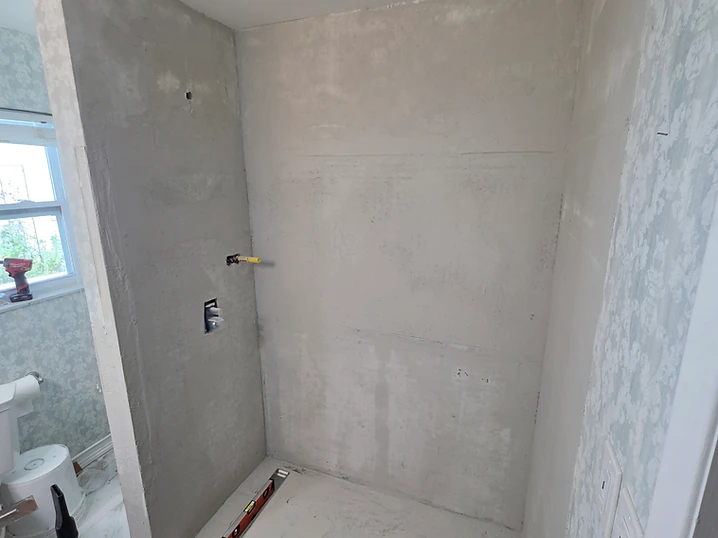
A shower remodel starts by taking the old shower apart — completely. We open the walls down to the studs and expose the subfloor so the framing, plumbing, and drain can be inspected before anything new is built. In this Largo-area bathroom, the old enclosure was removed down to bare wood studs and the concrete subfloor, revealing the PEX supply lines, the mixing valve, and the drain location.
Demolition is not just cleanup — it is diagnostic. Opening the walls lets us find water damage, rotted framing, corroded plumbing, or an incorrectly placed drain before we build on top of it. Installing new tile over an old shower with hidden problems is the most common reason showers fail early. A tile installer who skips this step to save time is building on a foundation nobody can inspect, and the homeowner pays for it later.
Plumbing Preparation Before Tile Installation
Once the walls are open, plumbing comes next — before any board, membrane, or tile goes in. Shower valves get repositioned to match the new layout, the drain is checked for placement and slope, and supply lines are secured so they do not move once the wall is closed.
On this project the mixing valve and drop-ear stub-outs were set at the correct height for the new fixtures, and the drain was aligned with the planned linear drain location. Coordinating plumbing before waterproofing matters because every pipe and valve penetration through the wall is a path water can find for years. Getting the plumbing right first means the substrate and membrane go over a stable, final layout — not over plumbing that still has to be moved. Good tile work begins long before the first tile is set.

Why Waterproofing Matters When Choosing a Tile Installer in Tampa
Tile and grout are not waterproof. Porcelain and ceramic tile shed most surface water, but grout lines and tile are full of microscopic pores — and the joints, corners, and drain opening are all paths for moisture. The real waterproofing happens behind the tile, in the substrate and membrane, and it is the single biggest difference between a shower that lasts decades and one that rots the wall behind it.
For this shower the walls were built with cement backer board — a stable, moisture-resistant substrate — fastened and taped at the seams. The shower floor was sloped to the drain so water never ponds, and transitions at corners, curb, and drain were detailed so moisture is directed in, through, and down rather than into the framing.
Choosing a tile installer in Tampa means choosing someone who takes shower waterproofing Tampa conditions seriously. High humidity, slab movement, and hard water all stress a shower, and a proper membrane system is what protects the structure behind the tile. The tile you see is the finish; the membrane you never see is the shower.


Building the Shower Floor and Linear Drain
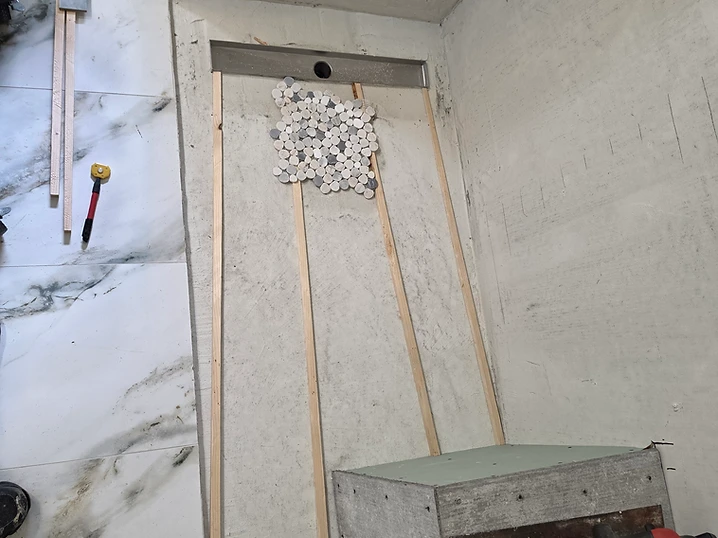
With the walls waterproofed, the shower floor gets built to drain. A shower floor that looks flat to the eye is actually pitched — every square inch slopes toward the drain so water moves, not sits. On this build the pan was formed with screed strips set to a precise fall, and a stainless steel linear drain was set into the left wall of the shower.
A linear drain lets the floor slope in one direction instead of four, which pairs well with large-format tile and a clean, modern look. Drain placement also drives the tile layout: the floor tile must be cut and aligned to the drain, and the slope has to read evenly across the whole pan. Details a homeowner will never see again after the tile goes in — the fall, the screed, the drain flange — are exactly the details that decide whether the shower drains completely or holds water and soap scum in low spots.

Professional Tile Installation and Layout
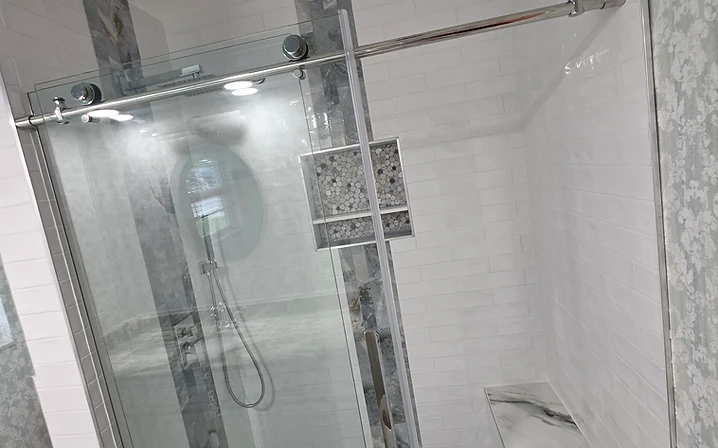
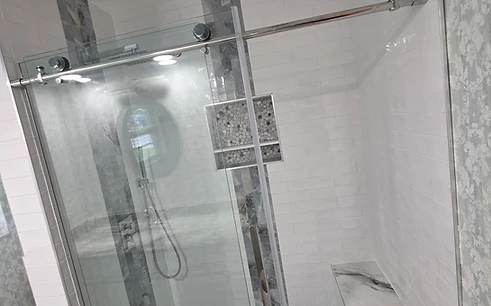
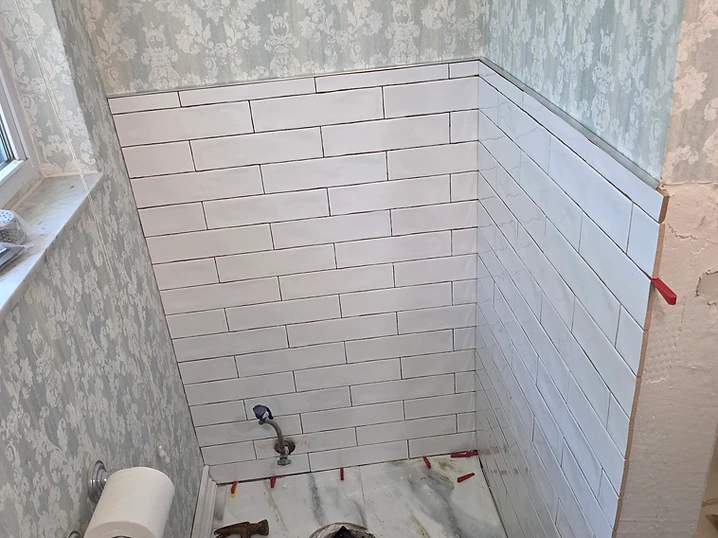
Tile layout is where preparation becomes visible. On this shower the walls were set with glossy white subway tile in a vertical stack — a clean, contemporary take on a classic profile. Layout started from the focal points — the niche, the corners, the eye-level line — so that cuts land where they belong and grout lines stay consistent from floor to ceiling.
Consistent grout lines, even spacing, and accurate cuts at corners and transitions are what separate a professional install from an average one. Red leveling clips kept large-format tile flat across the plane, and every cut around plumbing, the niche, and the drain was measured to the tile, not guessed. For professional tile installation Tampa homeowners can see the difference in the details — the corners that line up, the joints that stay parallel, the cut edges that are hidden or finished cleanly. A bathroom tile installer Tampa clients trust is one who treats layout as design, not just assembly.

Custom Shower Niche, Bench and Pebble Floor
Custom Shower Niche
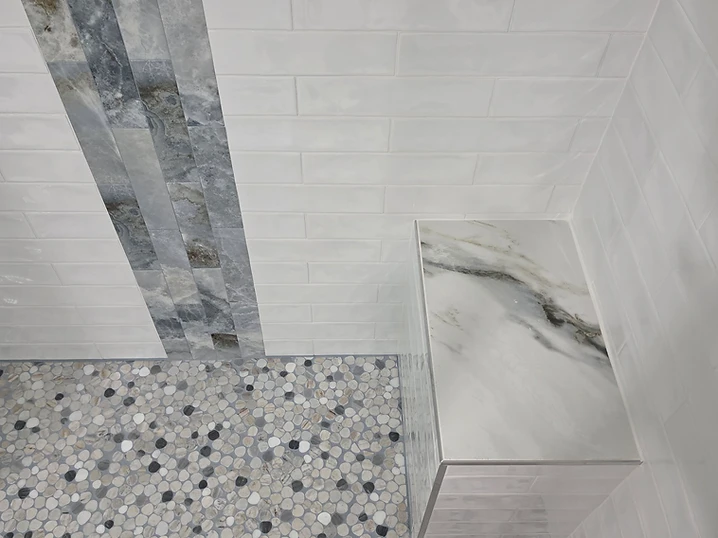
A recessed niche built into the wall holds shampoo, soap, and razors without a bolt-on shelf. The niche is framed into the studs, waterproofed as part of the wall, and tiled to match — here with a marble-look slab and a stone mosaic back. Because it is built into the wall cavity, it adds storage without protruding into the shower.
Built-In Shower Bench
A built-in bench is framed into the shower structure and tiled as part of the shower, so it is stable, waterproof, and continuous with the wall tile. It gives a place to sit, rest a leg, or set supplies, and it is integrated into the layout so the tile lines carry through it cleanly.
Pebble Shower Floor
The shower floor was finished with a pebble-style mosaic in neutral whites and greys. The rounded stones add texture and visual contrast against the flat white wall tile, and the many grout lines of a mosaic work well on a sloped floor where the tile has to follow the fall to the drain. A pebble shower floor installation brings a natural, spa-like feel while still performing on a properly sloped pan.

The Final Detail: Frameless Glass Shower Door
The shower was finished with a frameless glass enclosure — a single fixed panel and door held by minimal chrome hardware. Frameless glass keeps the bathroom visually open, lets the tile work read as the feature, and makes a modest bathroom feel larger and brighter.
The finished shower brings it all together: vertical white subway tile, a horizontal stone-look accent band, a custom recessed niche, a pebble mosaic floor, a built-in bench, a linear drain, and the frameless glass enclosure. Nothing ornamental is carrying the design — the materials and the layout do the work.