
From Studs to Glass: A Custom Marble-Look Shower Remodel in Largo, FL
A complete walk-in shower renovation in Largo, FL — from tearing the old shower down to the studs and relocating the drain, to installing large-format gray marble-look wall tile, a custom mosaic niche, a sloped mosaic floor, and a frameless sliding glass door.
A shower remodel is one of the most rewarding upgrades a homeowner can make in a Florida bathroom. It is also one of the projects where the quality of the work behind the tile matters the most. Waterproofing, drain placement, slope, layout, and finishing details are what separate a shower that looks good on day one from one that still looks good ten years later.
This project walked through every stage of a complete custom shower remodel in Largo, FL — from demolition down to the studs all the way to the finished glass door. Below is a look at how it came together, step by step.
Step 1: Demolition Down to the Studs
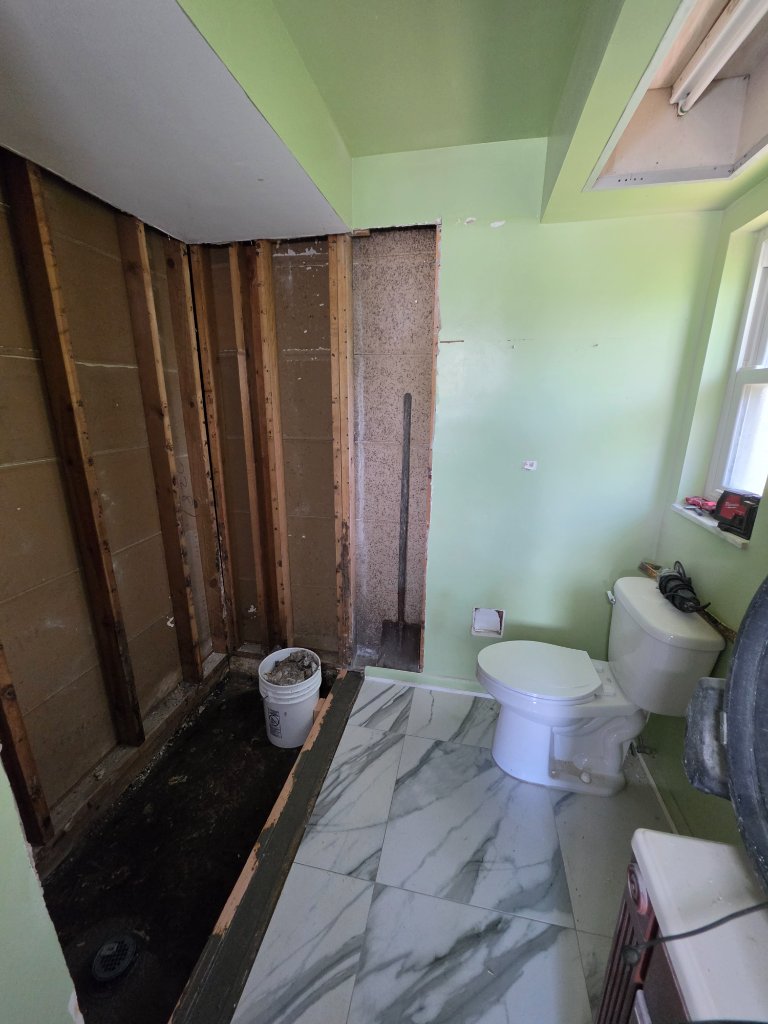
We started by completely removing the old shower down to the studs and opening the concrete floor to relocate and properly set the new drain. Tearing everything back to the framing gives a clean starting point and lets us inspect the structure, wiring, and plumbing hidden behind the old walls before any new work is built on top of it.
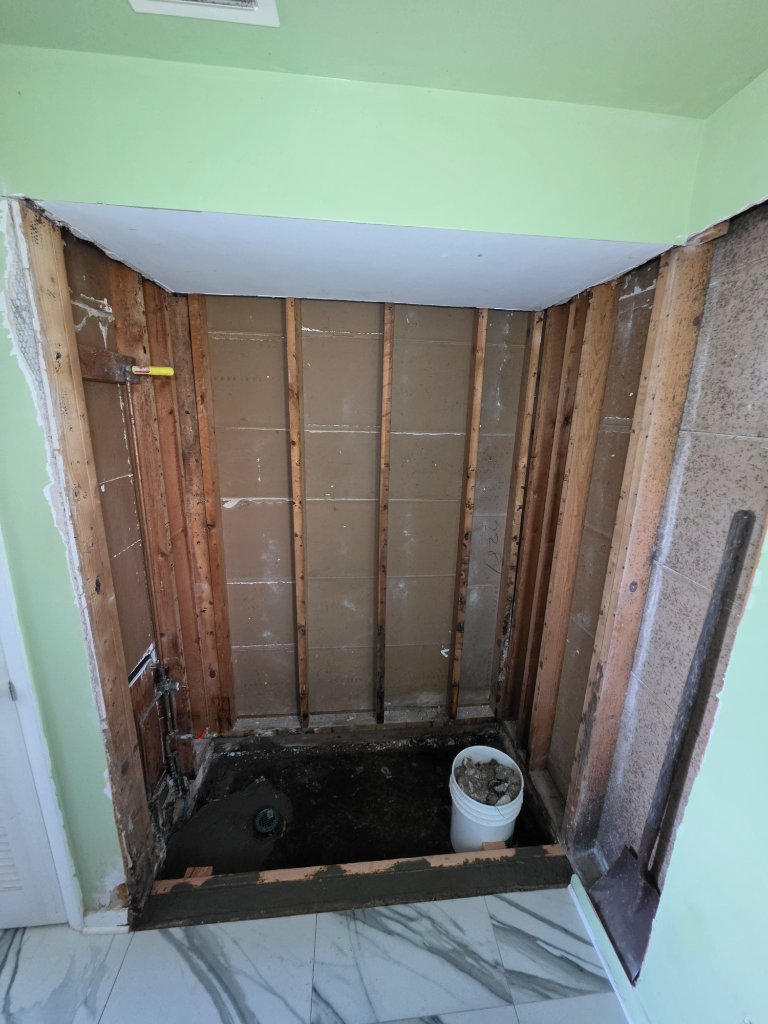
Taking the shower all the way back to bare studs and subfloor is the foundation of a reliable installation. Old paper, thin-set, damaged drywall, and imperfect framing should never be tiled over — they simply pass their problems forward into the new shower.
Step 2: Opening the Floor & Relocating the Drain
With the walls down, we opened the concrete floor to reposition the drain to the center of the new shower and tie in the plumbing the right way. Proper drain location is what allows the finished floor to slope evenly from every direction, which keeps water flowing toward the drain instead of pooling.
Once the plumbing and drain were positioned and set, the shower area was rebuilt and prepared for tile with moisture-resistant cement board and proper waterproofing behind every surface that would get wet.
Step 3: Rebuilding & Preparing for Tile
After getting the plumbing and drain positioned, the shower area was rebuilt and prepared for tile. Cement board was installed on the walls, seams were taped and waterproofed, and a recessed niche was framed into the back wall so the tile would have a clean, built-in place for shampoo, soap, and shaving essentials.
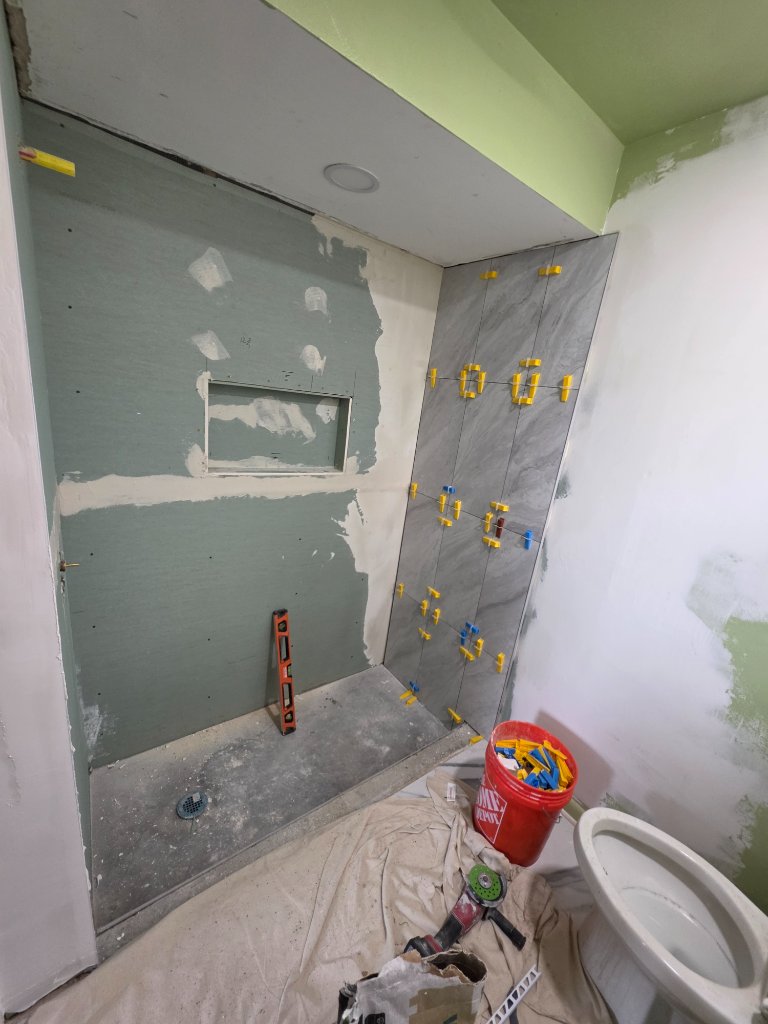
Preparation is the least glamorous part of a tile project, but it is the part that decides how the finished shower performs over time. A flat, plumb, and waterproof substrate is what allows large-format tile to stay straight and tight.
Step 4: Installing the Large-Format Marble-Look Wall Tile
Next we installed large-format gray marble-look tile on all three shower walls. The veining flows naturally from panel to panel, and tile leveling clips were used to keep every face perfectly flat with consistent grout lines across the entire enclosure.
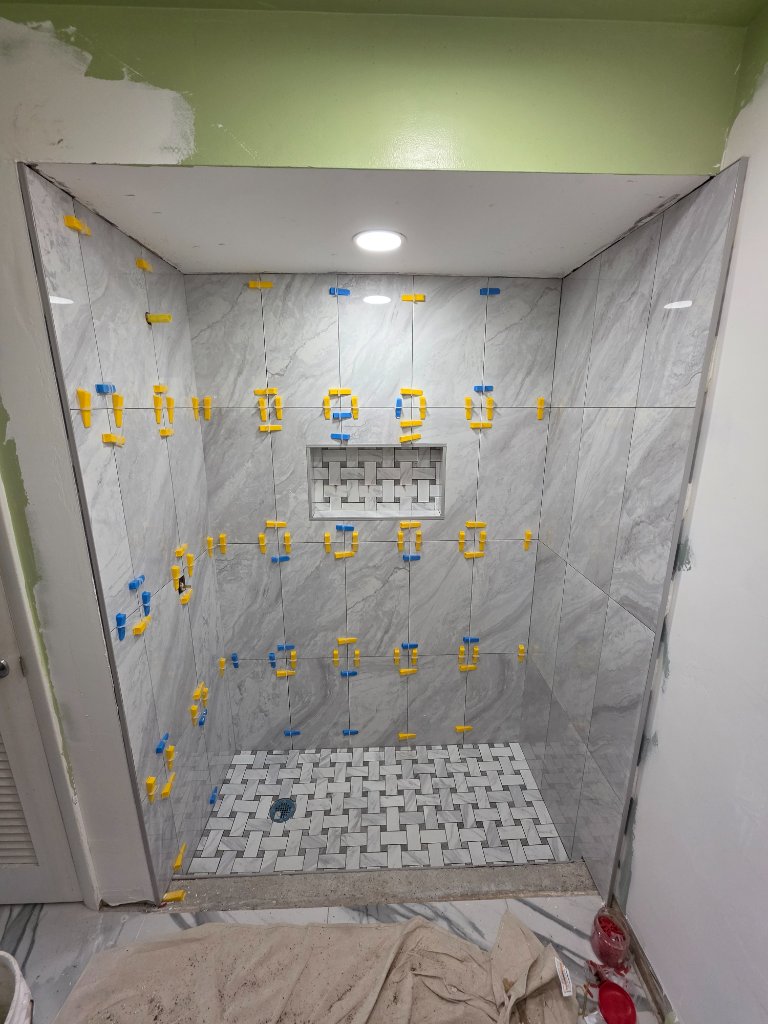
Large-format tile creates a clean, modern look with fewer grout lines, which makes the space feel larger and easier to maintain. But large panels also magnify any unevenness, so straight cuts and a flat plane are essential.
Step 5: Custom Recessed Niche & Mosaic Shower Floor
To add a custom detail, we added a recessed niche lined with a basket-weave mosaic tile that contrasts softly with the large wall panels. The same mosaic was carried onto the shower floor, installed with a proper slope toward the central drain.
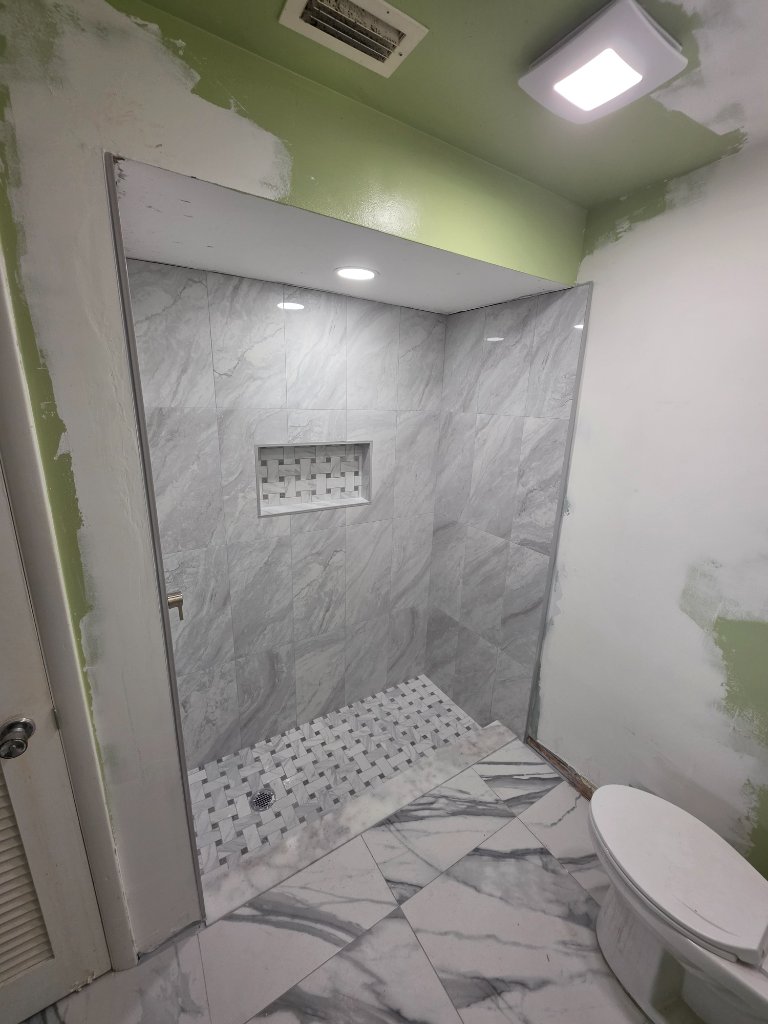
Matching the niche and floor with the same mosaic creates a coordinated, designed feel rather than a collection of separate materials. The sloped floor keeps water moving toward the drain so the shower dries quickly and stays clean.
Step 6: Finishing Touches — Grout, Paint & Fixtures
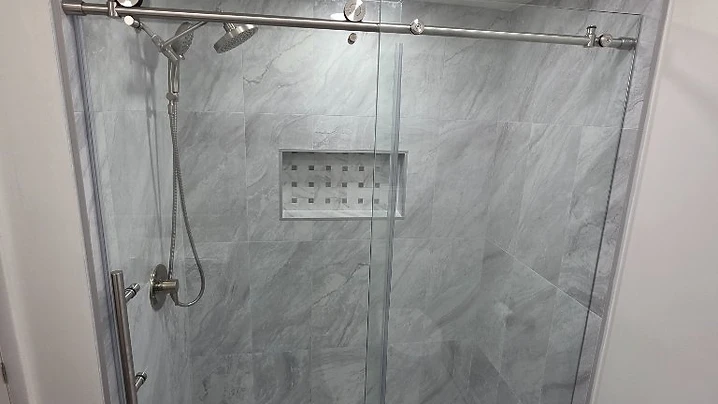
We finished everything off with grout, fresh paint, new shower fixtures, and a frameless sliding glass shower door. Brushed nickel hardware was used on the sliding door track, the handle, and the handheld shower, giving the shower a cohesive, modern finish.
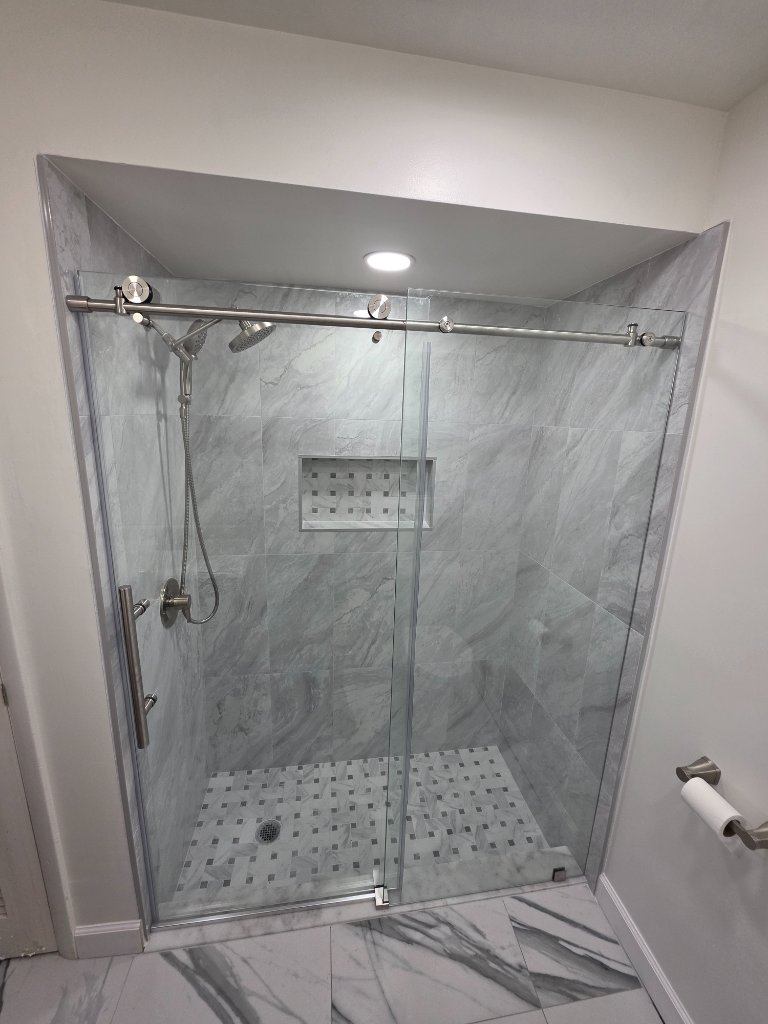
A frameless sliding door is a great choice for a bathroom where space is tight, since it does not swing outward into the room while still showing off the tile work inside.
Step 7: The Final Result
Here is the finished shower, viewed from inside — showing the dual brushed nickel showerhead, the custom mosaic-lined niche with metal trim, and the sloped mosaic floor beneath it all.
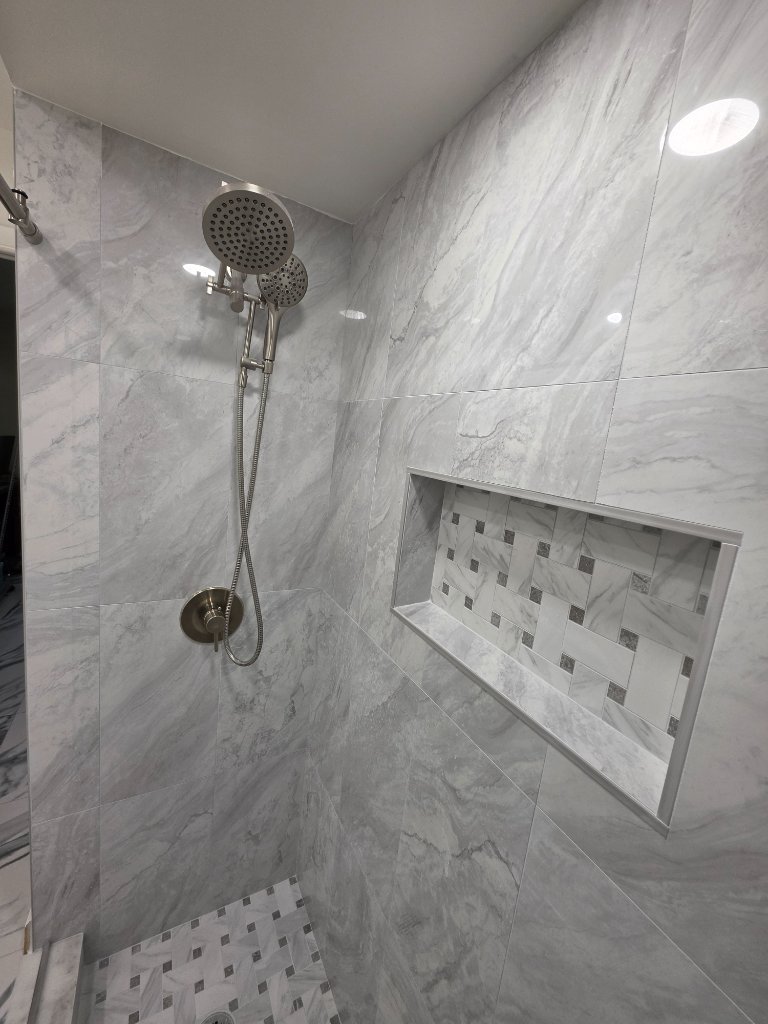
From bare studs to a finished, fully functional custom shower, this remodel shows what careful preparation, quality materials, and attention to detail can deliver. If you are planning a bathroom or shower renovation in Largo or the surrounding Pinellas County communities, we would be glad to help bring your project to life.
Ready to start your own shower remodel? Request a free estimate from Dream Tiles, Inc.