
Bathroom Remodel in Largo, FL: Custom Walk-In Shower Transformation by Dream Tiles Inc.
A complete bathroom remodeling project in Largo, FL by Dream Tiles Inc. — full demolition, waterproofing, a custom tiled walk-in shower, pebble-stone shower floor, coordinated tile flooring and gold fixtures.

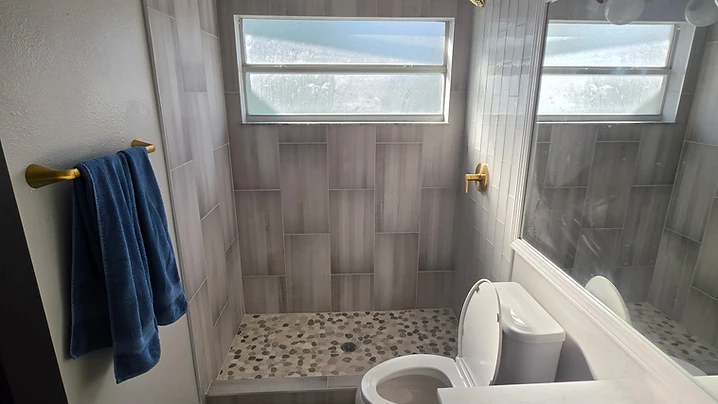
A bathroom remodeling project is one of the most valuable upgrades a homeowner can take on in a Florida home — and one where the quality of the work behind the tile matters as much as the tile itself. Proper demolition, preparation, waterproofing, plumbing, and precise layout are what separate a bathroom that looks good on day one from one that still looks beautiful years later.
This bathroom remodel in Largo, FL walked through every stage of a complete transformation — from full demolition down to the studs all the way to a finished bathroom with a custom tile shower, pebble-stone shower floor, coordinated tile flooring, and gold fixtures. Below is a look at how it came together, step by step.
Step 1: Full Bathroom Demolition
Every remodel started with a complete tear-out. The old bathroom was removed down to the studs so we could inspect the structure, wiring, and plumbing hidden behind the walls before any new work was built on top of it. Tearing everything back to a clean starting point is the only way to be sure the new bathroom is built on a solid, reliable base.
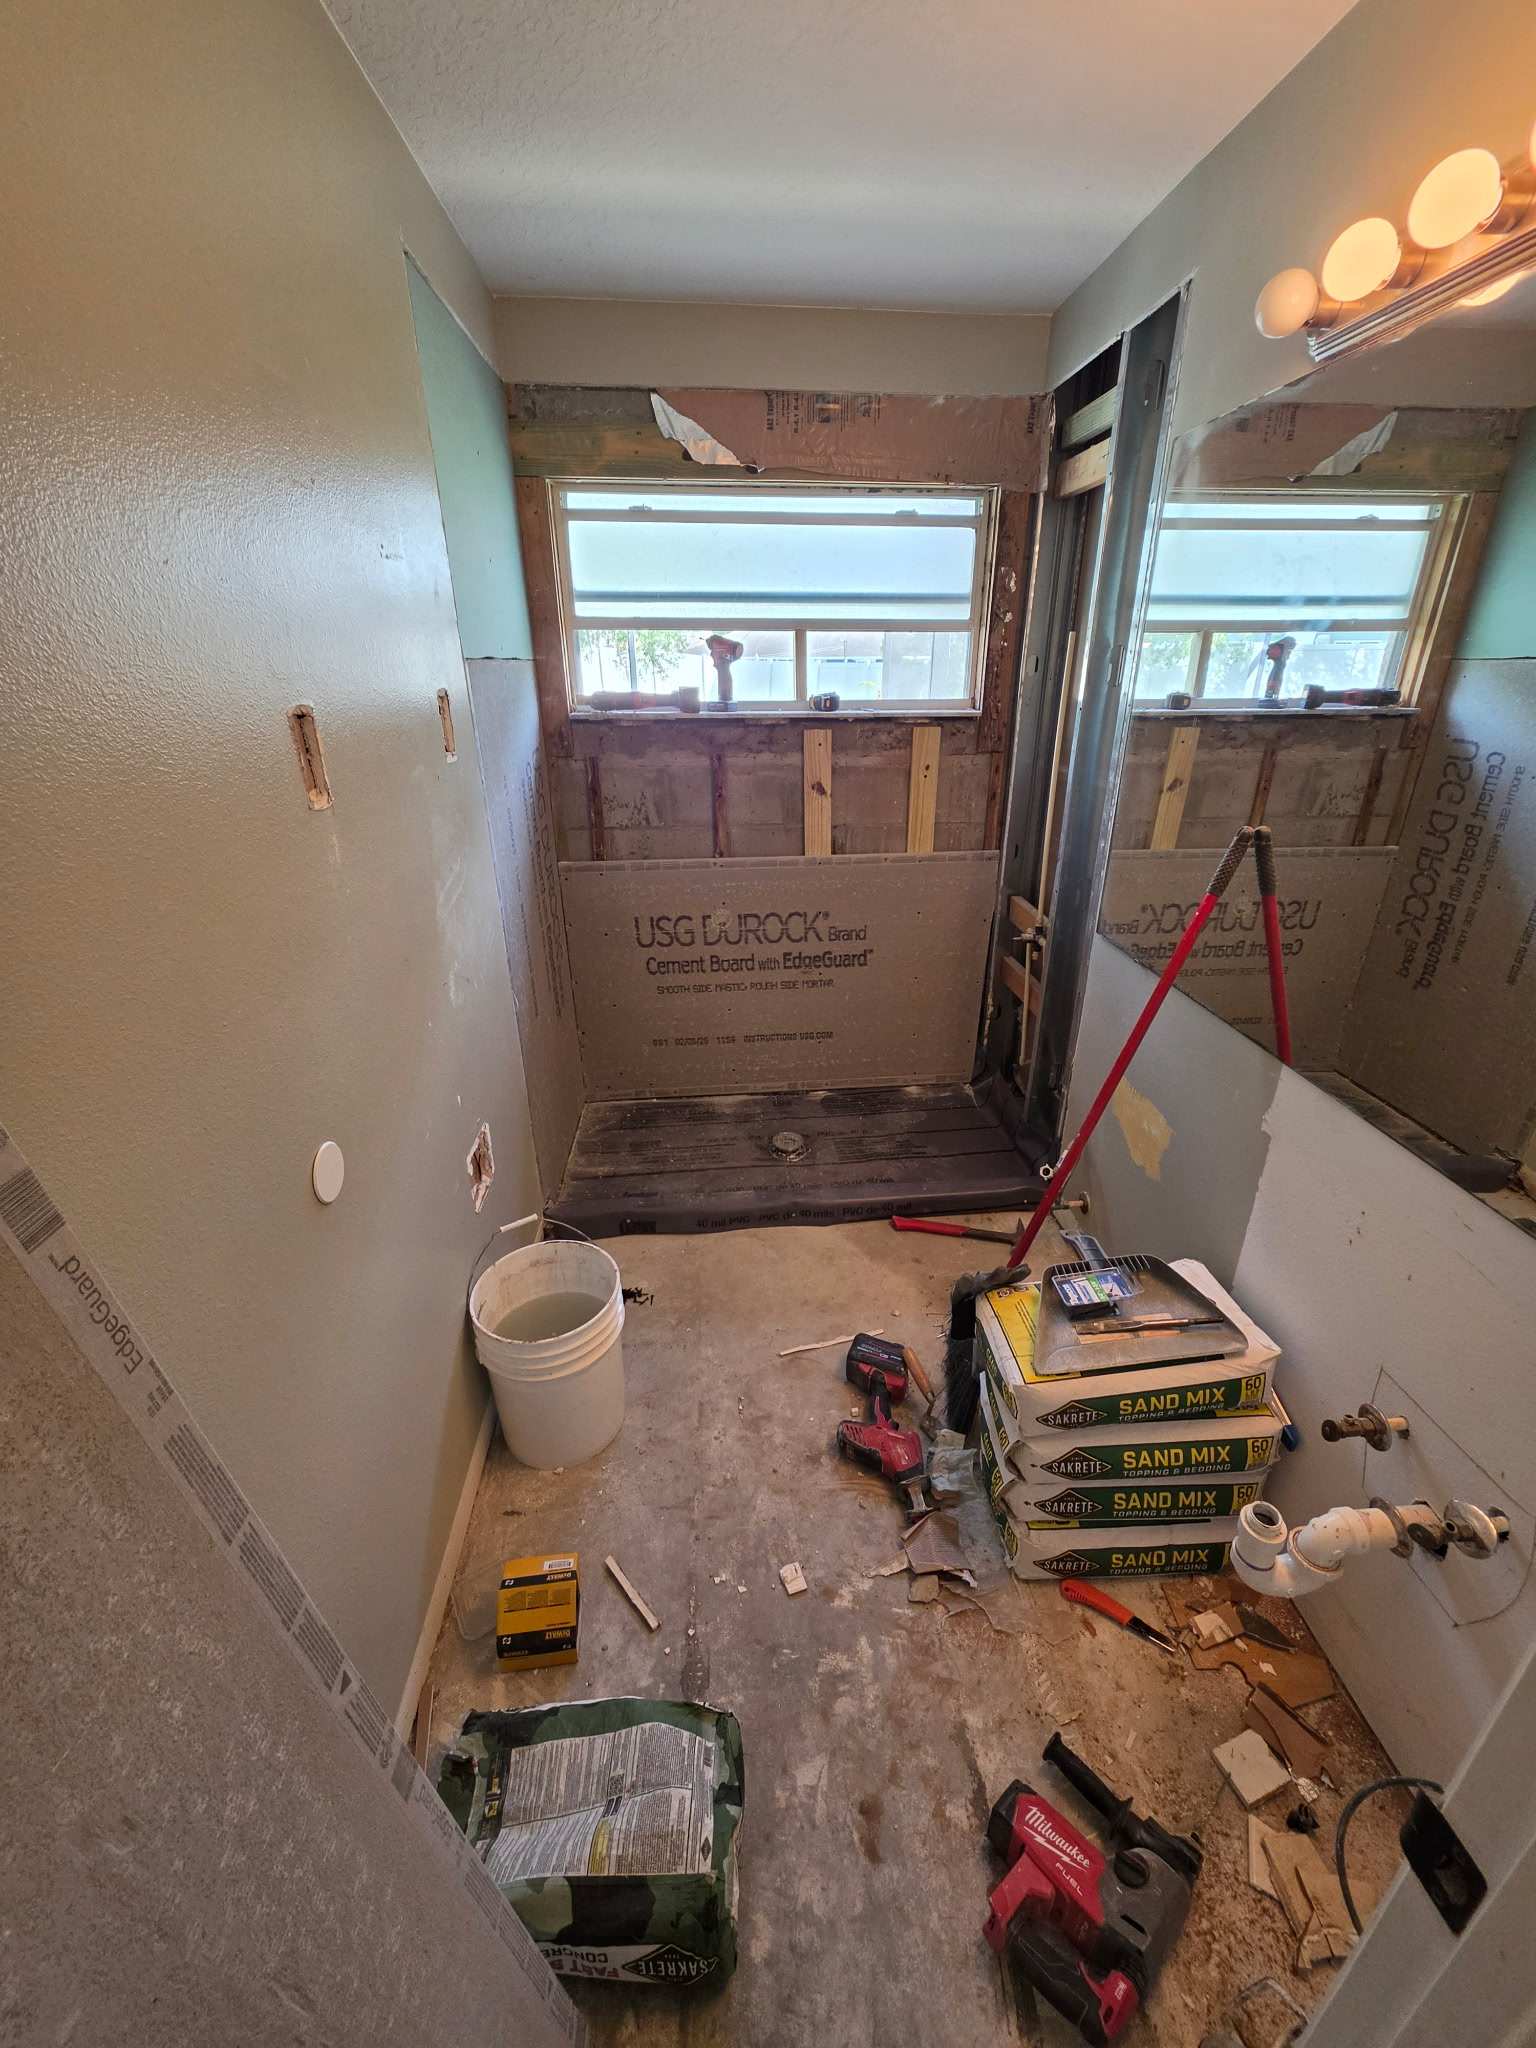
Old drywall, damaged materials, and imperfect framing should never be tiled over — they simply pass their problems forward into the new installation. The demolition stage is where a dependable bathroom renovation in Largo, FL really begins.
Step 2: Bathroom Preparation & Substrate
With the room opened up, we rebuilt and prepared every surface that would receive tile. Cement board was installed on the shower walls, seams were taped, and every surface was made flat, plumb, and ready for a precise tile installation. Preparation is the least glamorous part of the job, but it is the part that decides how the finished bathroom performs over time.
Step 3: Shower Waterproofing
Before any tile went up, the shower was waterproofed behind every wet surface. Proper waterproofing is the single most important step in a custom tile shower — it is what keeps water inside the shower and protects the structure of the home behind the walls. A flat, waterproof substrate is also what allows large-format tile to stay straight and tight for the life of the bathroom.
Step 4: Plumbing Preparation
With the walls open, the plumbing was prepared and positioned for the new shower head, fixtures, and drain. Setting the plumbing correctly at this stage ensures everything lines up cleanly once the tile, fixtures, and trim are installed. Adjusting the rough plumbing now — while the walls are open — is far easier and more reliable than trying to correct it after the tile is set.
Step 5: Custom Tile Layout
Next we laid out the tile pattern across the shower walls and the bathroom floor. A thoughtful layout balances the tile so that cuts fall in the least visible places and grout lines stay consistent from wall to wall and floor to floor. The wood-look rectangular tile was set in a clean staggered pattern that runs continuously from the shower walls onto the bathroom floor.
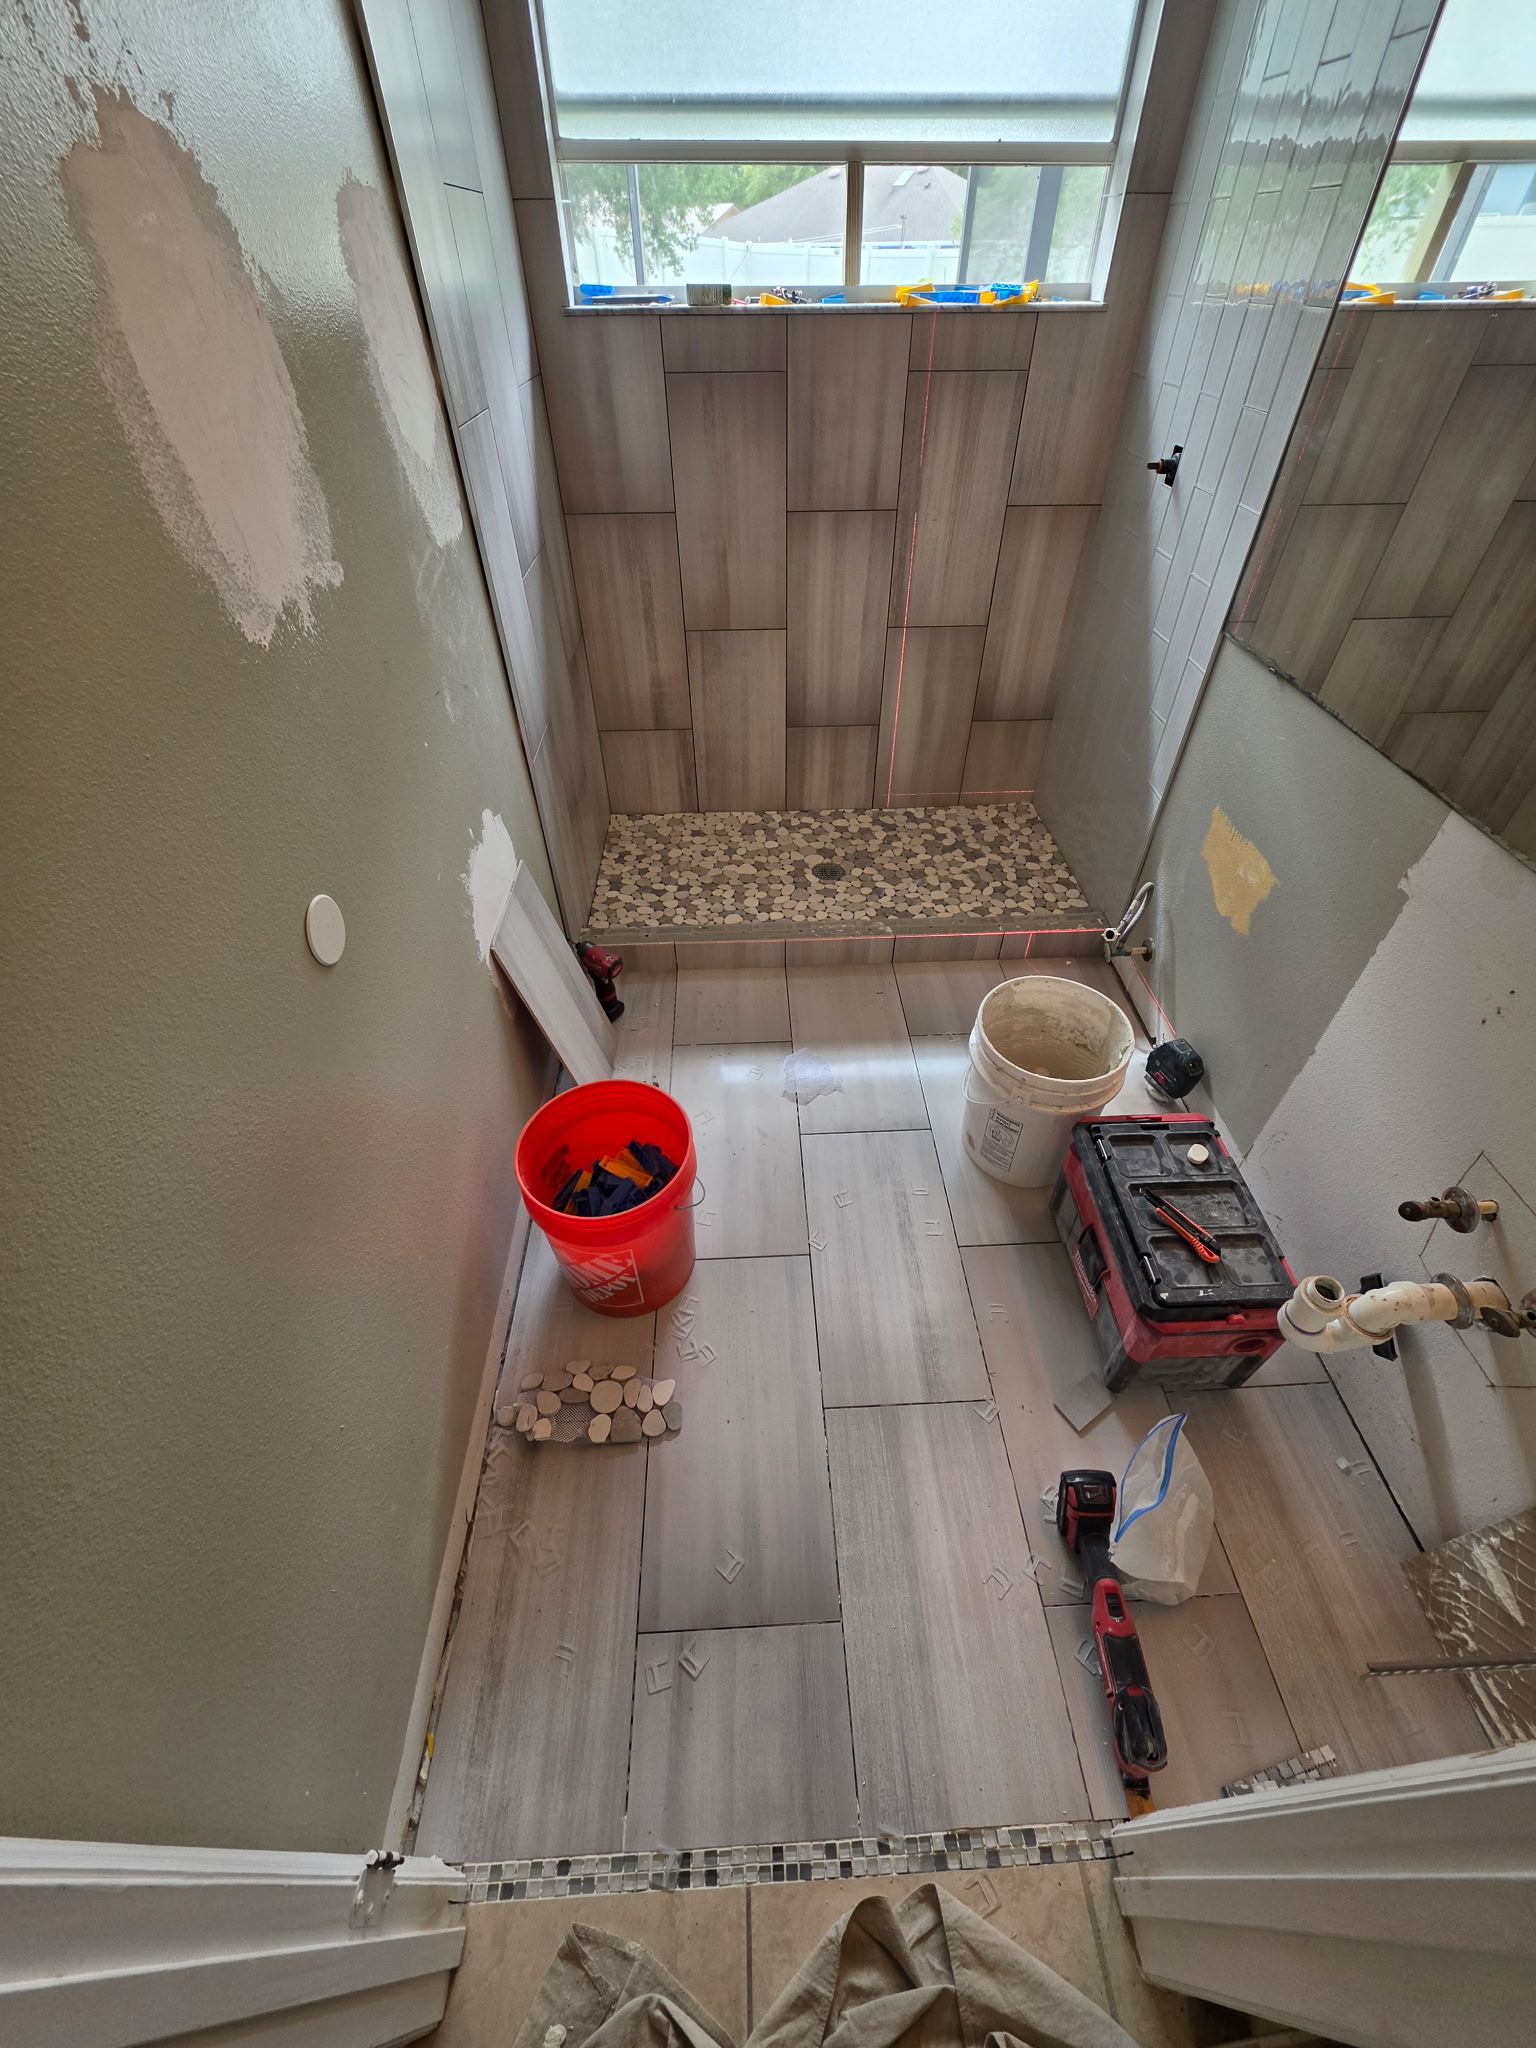
Tile leveling clips and spacers were used to keep every face perfectly flat with consistent grout lines across the entire room, so the finished installation reads as one designed space rather than a collection of separate surfaces.
Step 6: Custom Tiled Walk-In Shower
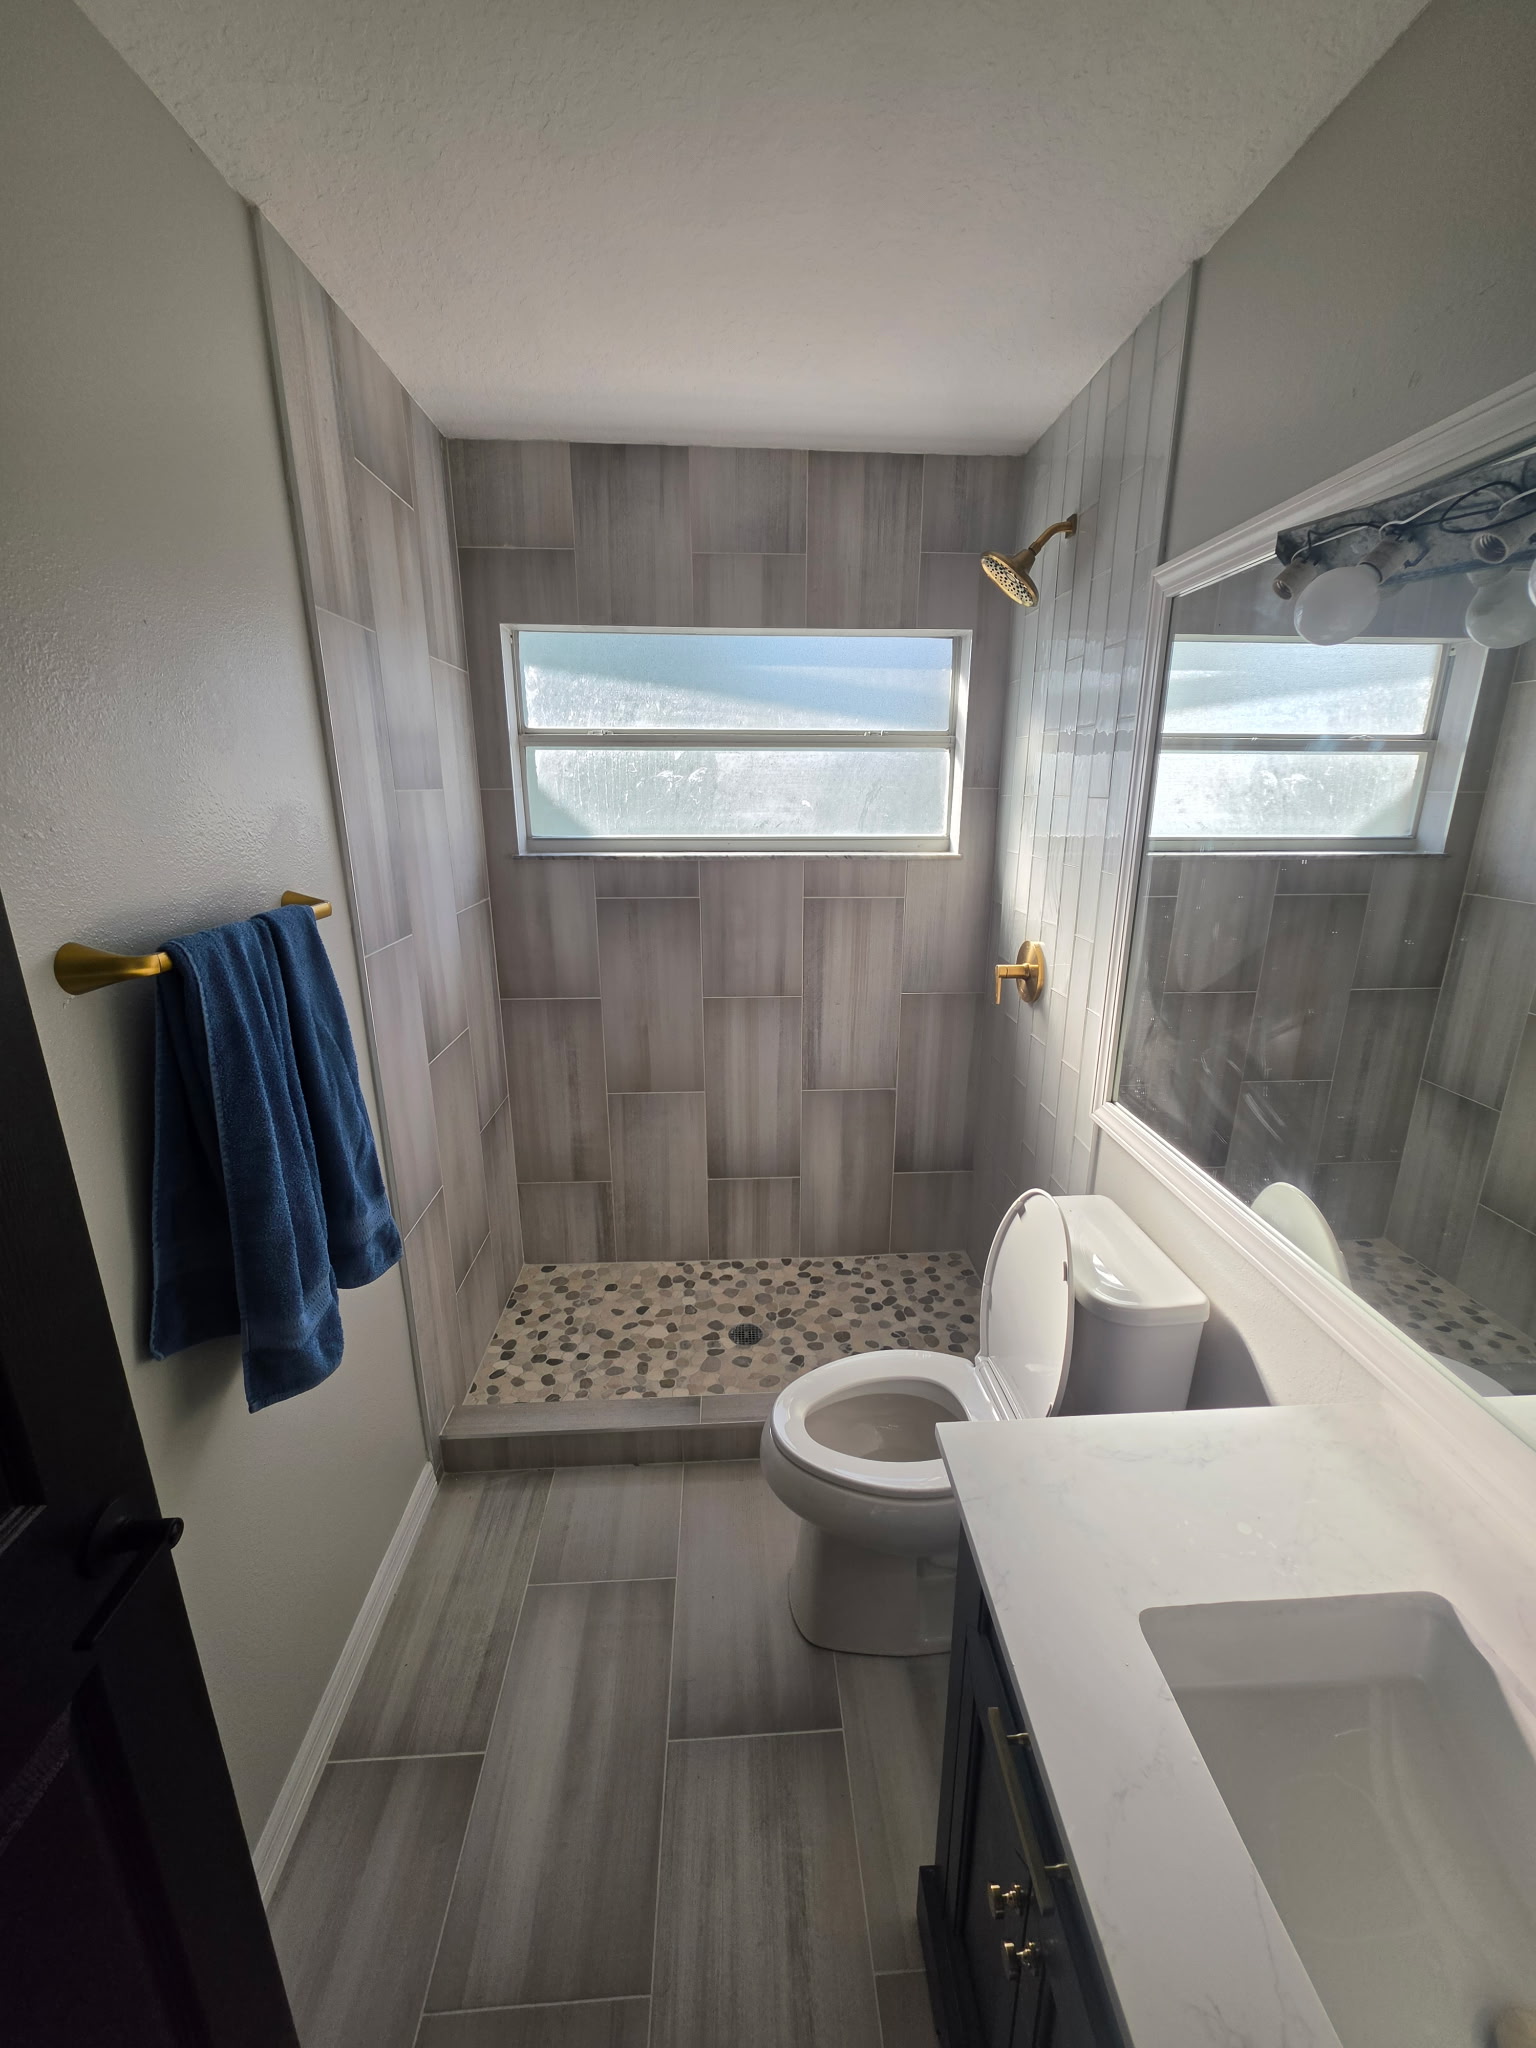
The custom tiled walk-in shower was the centerpiece of this remodel. Large-format wood-look tile runs up all three shower walls in a vertical staggered pattern, framing a centered frosted-glass window that keeps the shower bright and private at the same time. A vertical glossy white subway tile was used on the return wall for a subtle contrast that adds depth to the shower.
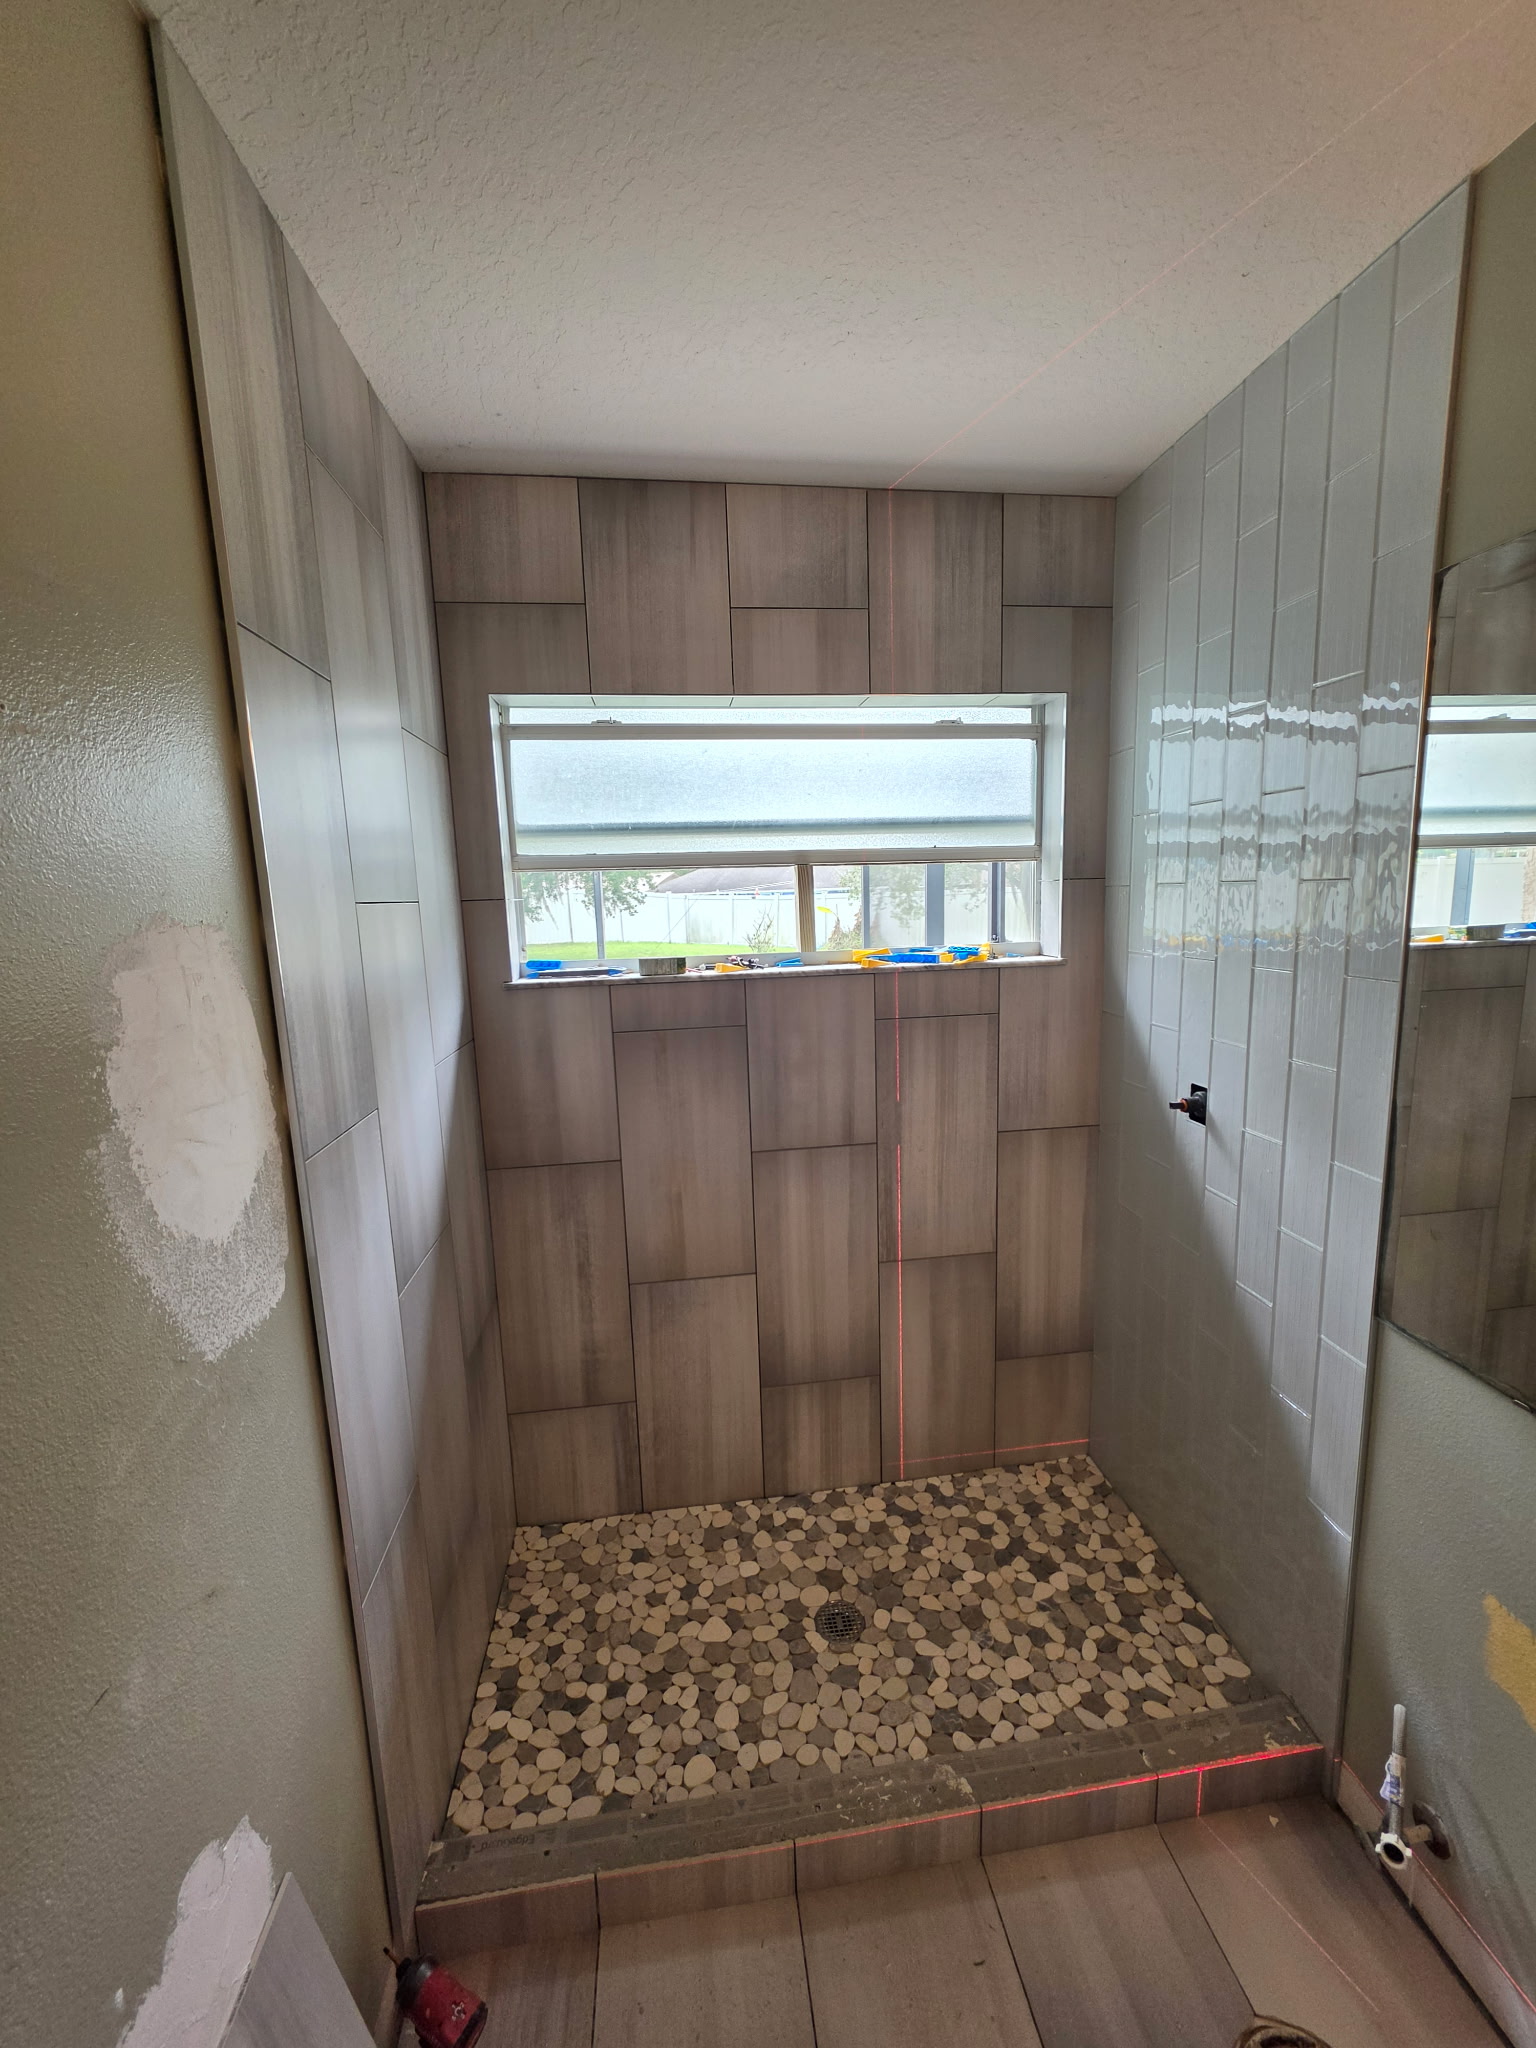
A laser level was used throughout the installation to keep every course plumb and the grout lines perfectly aligned from floor to ceiling — the kind of precision that makes a walk-in shower installation in Largo, FL look intentional and clean.
Step 7: Pebble-Stone Shower Floor
Inside the shower, the floor was finished with natural multi-toned pebble stones laid over a properly sloped pan. A pebble-stone shower floor gives the shower a warm, natural spa feel, while the sloped pan keeps water moving toward the centered drain so the shower dries quickly and stays clean.
Step 8: Coordinated Bathroom Flooring
The main bathroom floor was covered in the same large-format wood-look porcelain tile used in the shower, laid in a matching staggered pattern. Carrying one material from the shower onto the floor creates a coordinated, designed feeling and makes the whole room feel larger and more intentional — a hallmark of professional bathroom tile installation in Largo, FL.
Step 9: Gold Shower & Bathroom Fixtures
Brushed gold fixtures were installed throughout — the shower head and controls, the faucet, the towel bar, and the vanity hardware. The warm gold finish pairs beautifully with the cool gray wood-look tile and the white vanity, giving the finished bathroom a modern, elevated look without losing its warmth.
Step 10: Precision Tile Installation
Every cut, line, joint, and transition received careful attention. Sharp reveals at the window sill, clean inside corners in the shower, and flat transitions between the pebble floor and the wood-look wall tile are the details that separate a tile job from a custom shower remodel you're proud to stand behind. As your local tile contractor in Largo, FL, that level of precision is the standard.
Step 11: The Finished Bathroom
The finished bathroom is a complete transformation — a bright, clean, modern space with a custom tiled walk-in shower, a pebble-stone shower floor, coordinated wood-look tile flooring, gold fixtures, a marble-look vanity top, and a framed mirror that reflects the new shower back into the room.
From full demolition to the final tile, the result is a bathroom built to look beautiful and perform reliably for years — proof of what careful bathroom remodeling in Largo, FL should look like.
Planning a Bathroom Remodel?
If you're considering a custom tiled shower, new bathroom flooring or a complete bathroom renovation, Dream Tiles Inc. can help bring your project to life with professional preparation and precision tile installation.
Dream Tiles Inc.
www.dreamtilesinc.com
727-458-7860
Request an Estimate or contact Dream Tiles Inc. to get started.
View More Dream Tiles Bathroom Remodeling Projects
Want to see more of our work? Browse our full portfolio of completed bathroom remodeling and custom tile projects here on the Dream Tiles Inc. website.